My first hackathon experience

Hacking at the hackathonThis past weekend (Nov. 6-7, 2015), I attended the Seattle Social Justice Hackathon sponsored by the Seattle University Law School. I detailed my experience in a longer post, but here are the highlights.

The theme of the hackathon, making justice more accessible,  appealed to my latent activist persona (who doesn’t get out as much as he should), and I felt that bringing together a collection of designers, developers, lawyers, and social activists would, if nothing else, make for an interesting evening.

I wasn’t disappointed.

Our challenge

The problem I was drawn to was a way to help self-represented litigants (SRLs), a.k.a. pro se litigants. There’s a saying that, “A lawyer who represents him/herself has a fool for a client.” If that’s true for lawyers, what about someone with no legal training?  I know how difficult that situation is because I’ve been there, and done that. I would learn that my experience was not uncommon and that an estimated 36-million people become pro se litigants each year in the U.S. and they need help in many ways.

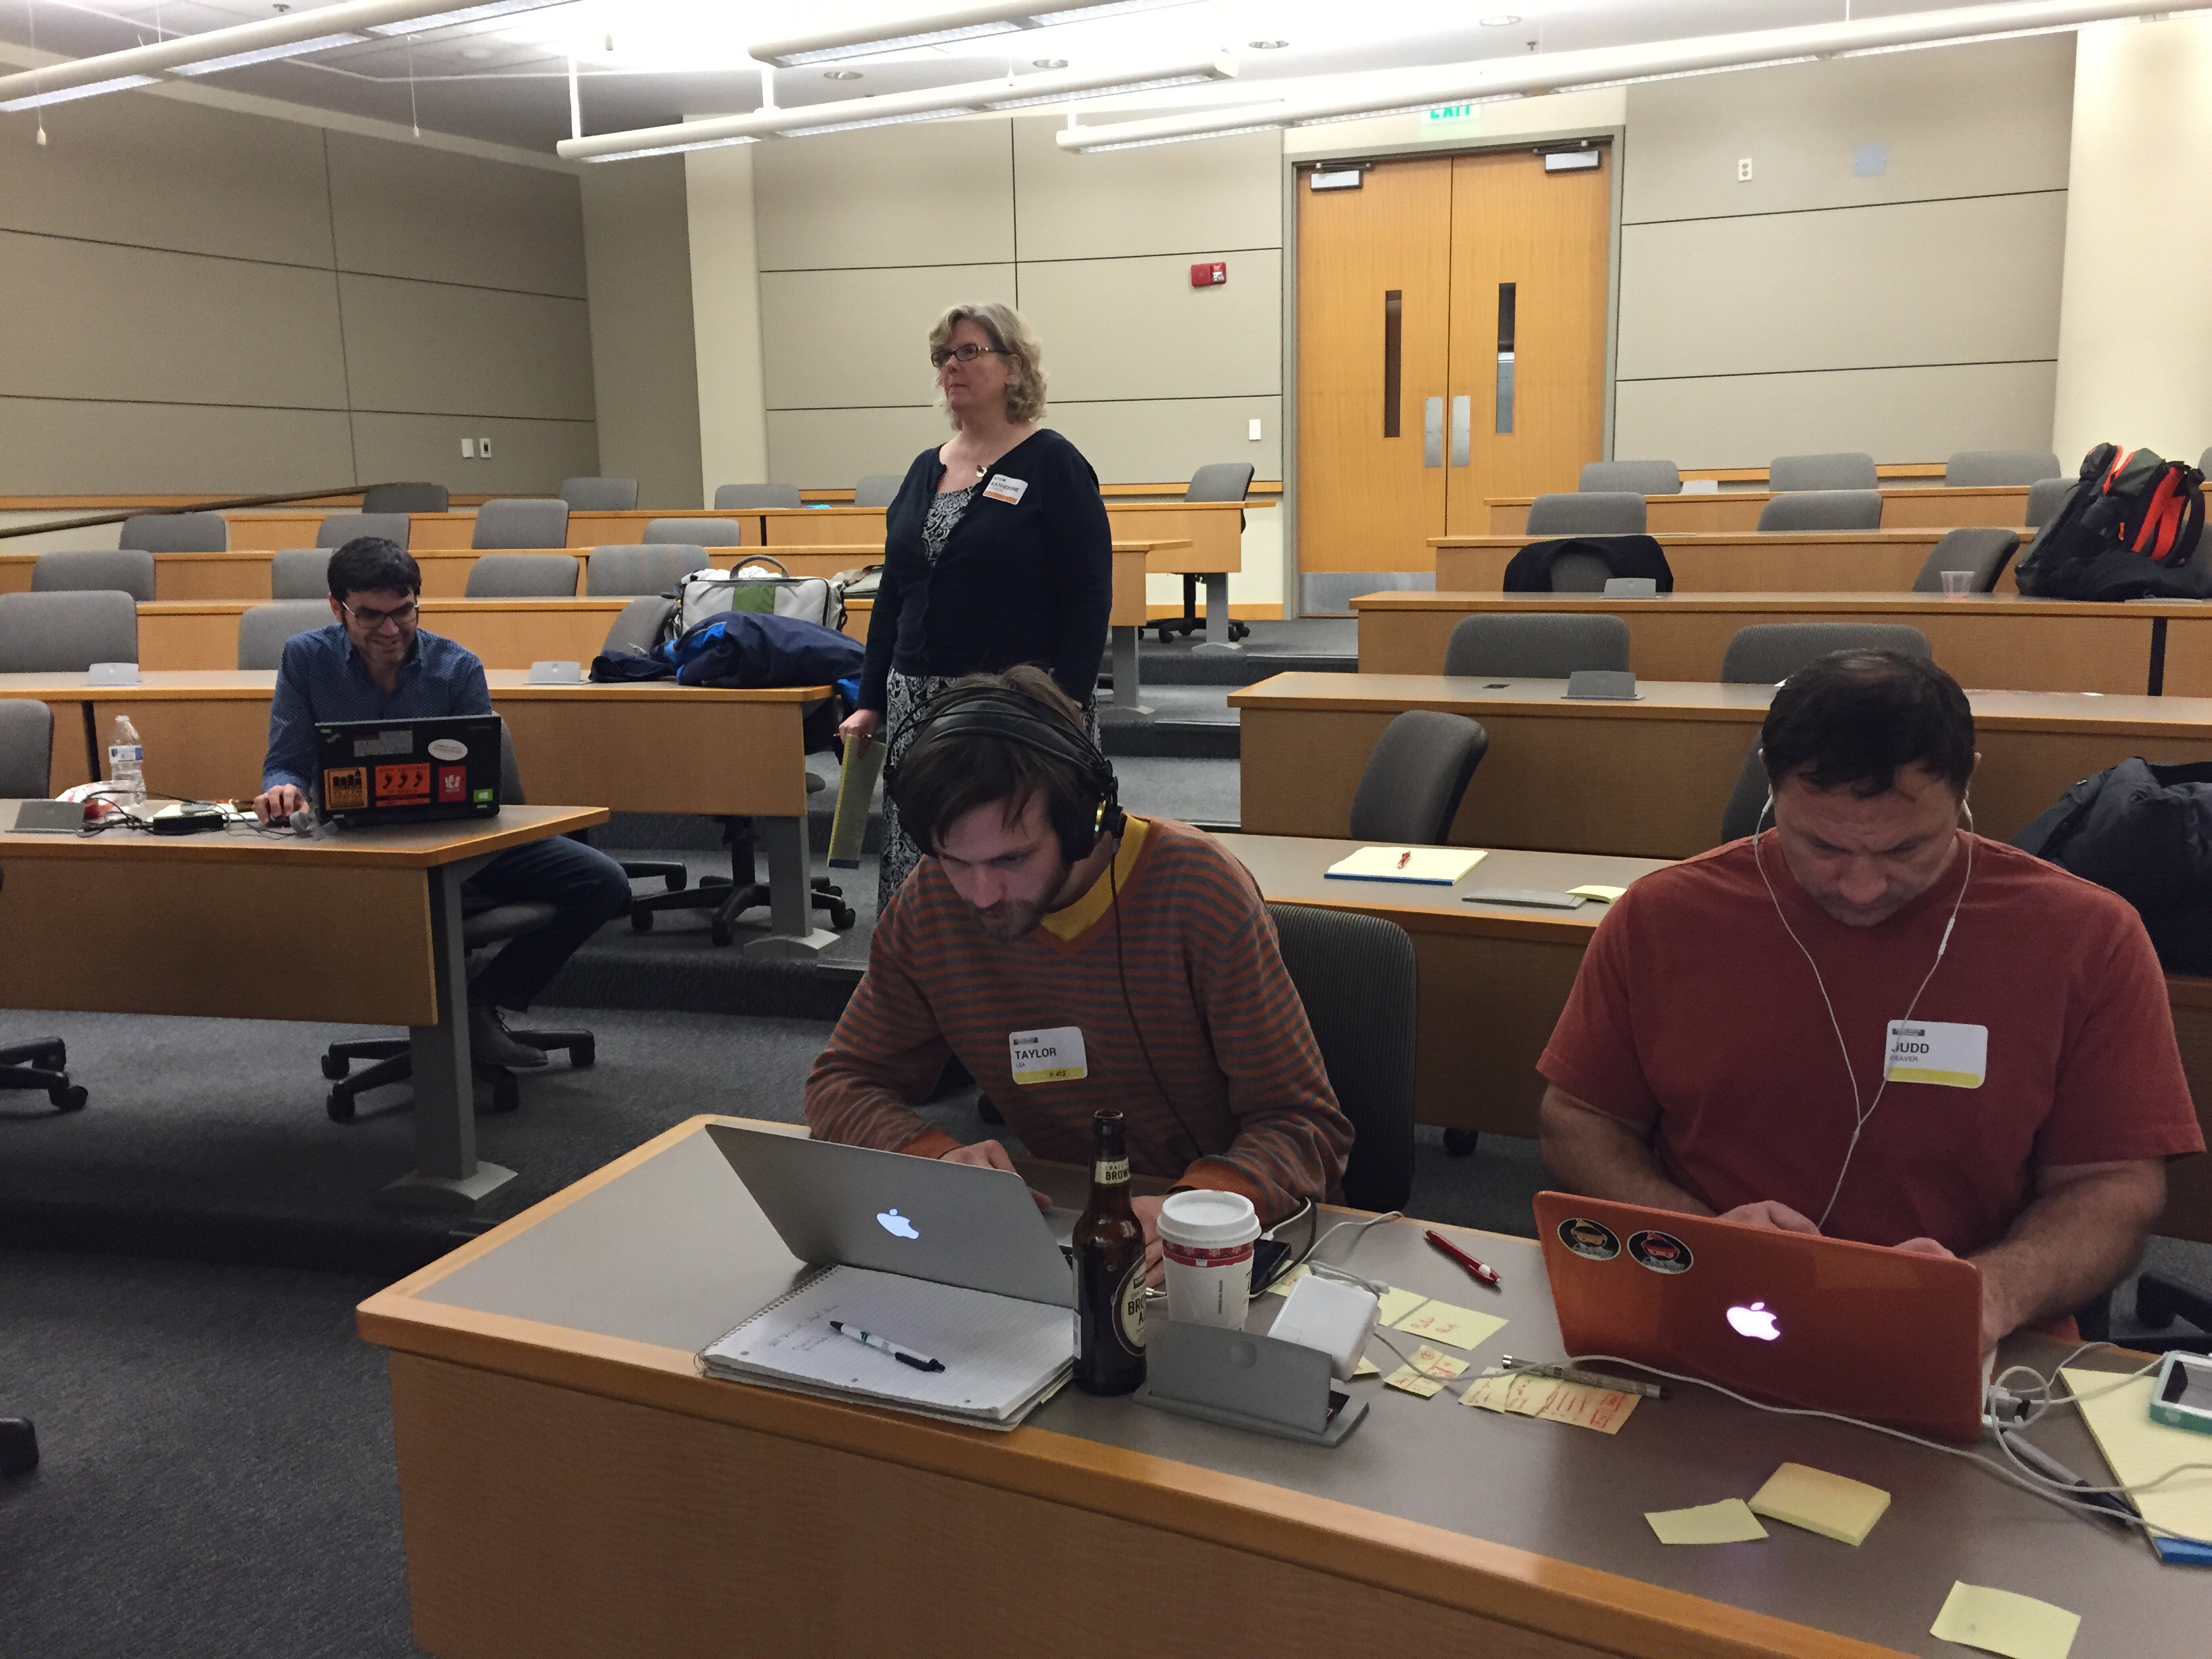
We formed a well-rounded team of six to tackle the problem: myself, the project owner/sponsor, a UX designer, and three developers. We dove into the problem and came up with a plausible technical solution in pretty short order, so the developers got started putting that together. As they worked, the sponsor, UX designer, and I started to understand the problem space in more detail.

The Court Whisperer is born

Our prize-winning app

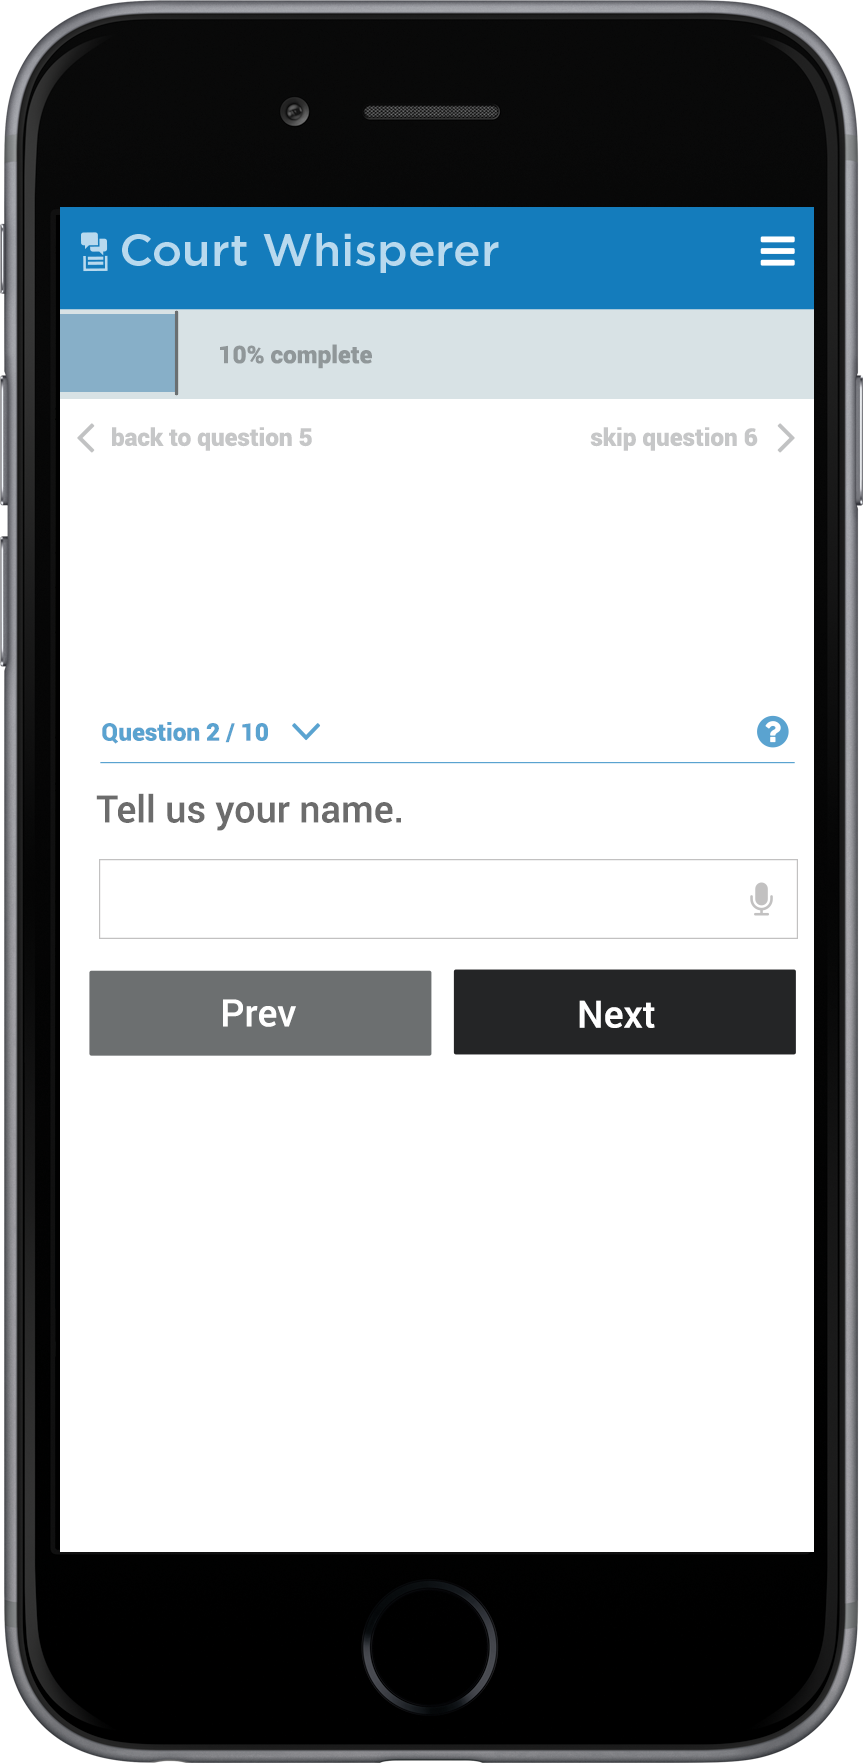
Normally, I wouldn’t recommend starting development before understanding the problem, but we understood enough of the problem and limited the scope of the technical solution to the part we understood well, so it worked out OK. Our understanding of the problem’s context evolved throughout the course of the event, hitting an abrupt pivot when a subject-matter expert (a law professor, no less) pointed out that an app that offered forms could be considered providing legal advice. Without missing a beat, we changed the context of our solution from an app that offers forms to an app that opens forms and then let the user enter data by speaking or typing it in while on their phone.

Fortunately, this didn’t alter the scope of the technical solution and so the developers barely noticed the change.

Dodging that bullet, we continued.I was the team’s PowerPoint wrangler and after several sessions with “pitch coaches,” I made a presentation with the fewest words ever (for me): Seven (with a vocabulary of only four). This event was a first in more ways than one.

We won first place!

Finishing the presentation, including the demo, with something like 57 seconds to spare, we impressed the audience with our story of how the Court Whisperer would help the estimated 36 million SRLs who interact with the courts each year in the U.S.

Apparently we also impressed the judges who gave our team first place and we’ll proceed with two other teams to another competition, next January.

Aircraft headset adapter – reflection

The finished adapter in service.
The finished adapter in service

Reflecting on my adapter project, I can’t help but compare it with the timer project–even if that’s not fair on many levels,

The project went pretty much as I expected. The circuit was simple and tested. There weren’t many known unknowns, but there are always the unknown unknowns.

On top of all this, I started the adapter project with a few more years of experience than I started the timer project.

It’s amazing how far in advance you can see the problems when you know what you’re looking for.

Unknown unknowns

They are what keep things interesting. In this case, it was the white Cat-5 Ethernet cable I used to connect to the radio. This cable has the double advantage of being inexpensive and having the connector attached. It has eight conductors arranged as four twisted pairs. The catch is the pairs make sense for the signals they are designed to carry, not my application. Bottom line, they pairs are not connected in a 1,2,3, 4… order, but as 3,4,5,6,1,8,2,7. Not the order I expected (even after researching the cable).

Measure twice, cut once, is how the carpenter’s saying goes. For this project it might have been better phrased, Measure twice, cut once, and then test two or three times.

Fortunately, no harm came to the project or the radio to which I connected and tested it (i.e. I was very lucky).

The biggest challenge was in the mechanical design, not the electrical design. I spent most of the time finding components and fitting them into as small of a box that I could. Arranging the components on the circuit board to line up the microphone-level adjustment potentiometer beneath the headphone jack was another mechanical challenge. Doing all this before drilling holes in the rather expensive ($17) case was another challenge.

Unfair comparisons

How did this project compare to the timer project?

  • Complexity: This had far fewer components and a much simpler function than the timer.
  • Tools: This project was designed and tested on the computer and built on tried and tested circuits whereas the timer was built and the components were fitted without any computer assistance.
  • Information: I was able to obtain electrical and mechanical information online to support the computer testing and design for this project and while this information was also available for the components used in the timer, it had to be applied manually (i.e. copied from a book).
  • Experience: Like I said, this wasn’t really a fair comparison. This was built with the help of many years of project experience.
  • Tooling: In this case, the comparison is actually fair in that both projects were fabricated with simple hand tools. It would have been nice to make a printed circuit board, make the holes with a drill press, and use something besides plumbers’ tape, but it wasn’t necessary.

So far, the adapter has been working as designed for the past two years, and still looks pretty good (even if I do say so, myself).

Aircraft headset to ham radio adapter

Aircraft headphone adapter mounted to ham radio
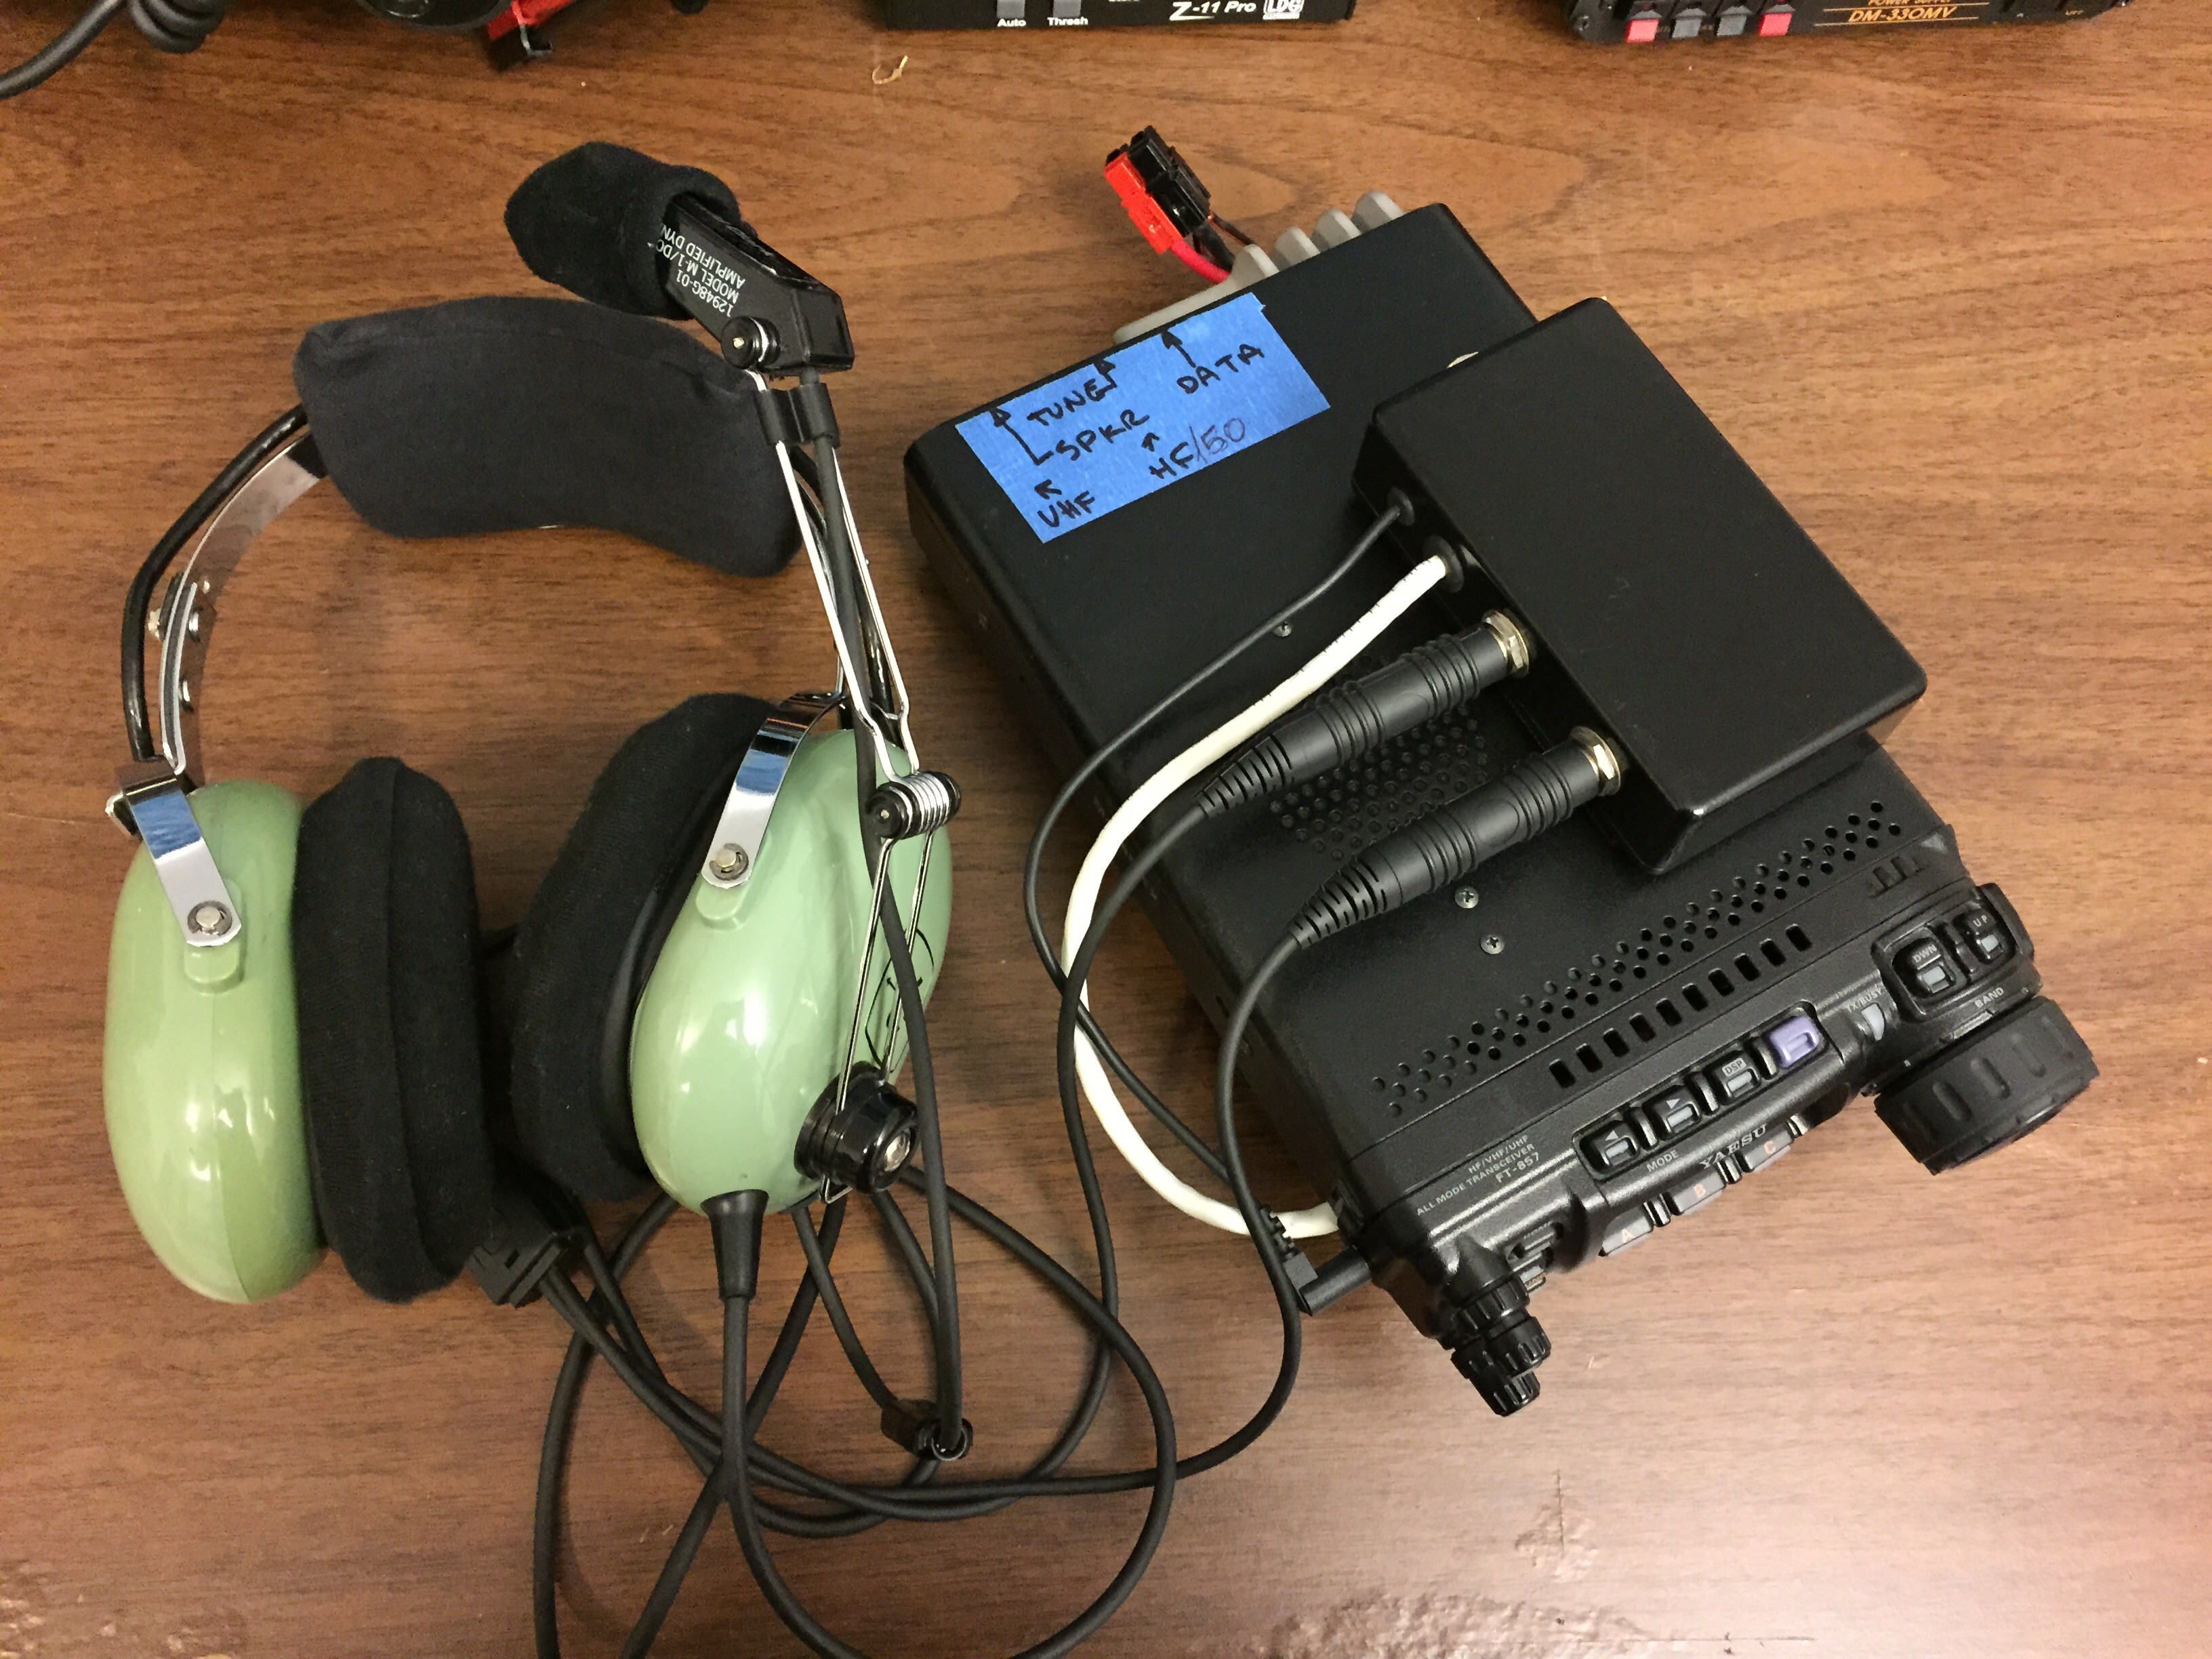
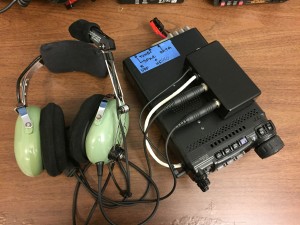
Catching up on long-overdue blog posts, here’s a project I did a couple of years ago to adapt an aircraft headset to my Yaesu FT-857D ham radio. Aircraft headphones are optimized for the high-noise environment of an airplane—the earmuffs keep the ambient sound (noise) out and the microphone is designed to let only the pilot’s voice in. While I haven’t used my ham radio in a plane, the headset works well in other noisy environments.

OK, but why an adapter?

A little history

Aircraft communication systems had their formative years in the 1930s and 1940s; so much of the communication technology used in today’s aircraft was designed to meet technical requirements established back in the ’30s.

For this project, the microphone technology standards are what drive the requirements. The electrical standard for aircraft microphones is based on the carbon microphones used back in the formative years. Besides being available in the 1930s, carbon mikes are naturally noise cancelling and work well in an airplane. They also need some electrical current to work. This adapter provides the current necessary to make an airplane-compatible microphone work with a ham radio and it adapts the connectors–the headset’s connectors are also not compatible with those used by the ham radio.

The project

The design project was more mechanical than electrical. The headphones (speakers) on the headset are electrically compatible, so only a connector adapter is necessary. The electrical circuit used is a composite of several I found on the web and in QST, the magazine of the ARRL, and requires only a few components. Nevertheless, the hard work was in getting it all to fit in a box. Unlike my timer project, looks and durability were important design criteria.

Some of the requirements:

  • The high-order bit: it had to adapt an aircraft headset to the ham radio.
  • The adapter case had to support the stiff headset connectors.
  • The case had to be as small as possible, but large enough for all the connections and cables.
  • The cables and connectors had to survive multiple connections and disconnections.
  • The case had to be removable but, when mounted to the radio, mounted securely.

The results

The end result came out rather well and has survived two years of domestic and overseas deployments. With any luck, it’ll survive as long as the timer project I described a while back.

HeadsetAdapterBox contains the mechanical drawings, circuit schematics, and parts list, if you’re interested in building one. (Some assembly required–actually, ALL assembly is required!)

The inner workings of the finished adapter
My favorite design detail: positioning the microphone gain control so that it can be adjusted without opening the case--it is accessible through the headphone jack.
My favorite design detail: positioning the microphone gain control (the blue square with a white circle, located in the center of the image) so that it can be adjusted without opening the case–it is accessible by inserting a long, insulated, adjustment screwdriver through the headphone jack (the connector to the left of the white cable). Of course, after all this, it didn’t need adjusting.
The finished adapter mounted and ready for service.

Update

This topic has received a lot of traffic, lately, so I thought I’d add some additional links. I’ve not been able to find links to the ARRL references I mention above. When I do, I’ll add them here. Also, I don’t want to give the impression that I invented any of this. The circuit is very common. Mine derives from Aviation Headsets for Ham Radio, which derives from Aviation Headset Connected to FT-897, posted a few years earlier. As I recall, one reference I found for this application was from the 1990’s. I adapted these to my particular application and, if anything, my contribution to the project was in the mechanical design, more than the electrical circuitry. Along those lines, I will say that after the past few years of use, the industrial Velcro attachment method has proven to be quite reliable.

If I had to do it again, I would add an external speaker jack and switch. Plugging in the adapter to the radio’s headset jack disables the radio’s speaker. That’s great when you’re operating by yourself, but when there are people huddled around you who also want to listen (and you don’t want to give up the convenience and clarity of the headset), not being able to also output the audio to a speaker can make things awkward.

For your convenience, and to save you from rummaging through Google, here are some more links on the subject. You’ll notice they have a lot in common, with variations to accommodate their individual applications. Some of the pages were posted since my article, and they are in no particular order. They are here only to help you make the best adapter for your application. Enjoy!

Best practice…for you?

Last week, I saw a post in LinkedIn about a “new” finding (from 2012) that “New research shows correlation between difficult to read fonts and content recall.” First, kudos for not confusing correlation and causation (although, the study was experimental and did prove a causal relationship), but the source article demonstrates an example of inappropriate generalization. To the point of this post, it also underscores the context-sensitive nature of content and how similar advice and best-practices should be tested in each specific context.

Hard to read, easy to recall?

The LinkedIn post refers to an article in the March 2012 issue of the Harvard Business Review. The HBR article starts out overgeneralizing by summarizing the finding of a small experiment as, “People recall what they’ve read better when it’s printed in smaller, less legible type.” This research was also picked up by Malcolm Gladwell’s David and Goliath, which has the effect of making it almost as true as the law of gravity.

Towards the end of the HBR article, the researcher tries to rein in the overgeneralizations by saying (emphasis mine), “Much of our research was done at a high-performing high school…It’s not clear how generalizable our findings are to low-performing schools or unmotivated students. …or perhaps people who are not even students? Again, kudos for trying. Further complicating the finding stated by the HBR article is that the study’s findings have not been reliably replicated in subsequent studies, other populations, or larger groups. I’m not discounting the researcher’s efforts, in fact, I agree with his observation that the conclusions don’t seem to be generalizable beyond the experiment’s scope.

Context is a high-order bit

All this reinforces the notion that when studying content and communication, context is a high-order bit1. As a high-order bit, ignoring it can have profound implications on the results. Any “best practice” or otherwise generalized advice should not be considered without including its contexts: the context in which it was derived and the context into which it will be applied.

This also reinforces the need to design content for testing–and to then test and analyze it.


1. In binary numbers, a high-order bit influences the result more than any and all of the other lower-order bits put together.

What I learned by building a project from scratch – Epilogue

v1.0 of my camera self-timer

My last two posts described a project that I took from conception to working prototype.

Post 1     Post 2

Finding it in my garage gave me the chance to reflect on the design process through the lens of historical recollection. While historical recollection isn’t the most accurate process, given how memory works (or doesn’t), the self-timer I found in the garage is really just an artifact to focus my reflection.

Reflection

The first thing I realized was what I didn’t realize at the time. What I recall at the time was how each subsequent step (Idea, design, working demo, prototype, and beyond) seemed to require about an order of magnitude more effort.

  1. The idea? About 5 seconds.
  2. The sketch? 5 minutes.
  3. The design? 5-8 hours.
  4. The working demo? A couple of days.
  5. The prototype in the photo? About another week.

That ratio has been reinforced in my subsequent experience as a software developer and even as a writer. What I didn’t appreciate at the time (or for a long time after this project) is how often I would try to be convinced that this wasn’t going to the case in this project (whatever this project was at the time).

Only experience would reveal that.

Lessons

Looking back on this project as a way to learn the lessons I listed in the earlier posts, I wonder if I could have learned those lessons at the time–while building the project. Maybe. What I realize now is that I didn’t recognize the significance of what I learned during the project.

Feature creep? Happens all the time and requires a constant vigilance and focus on the goal to avoid.

The illusion of a prototype/demo being the final project? Another element that has profound impact on the perception of the project–one that can work for or against you, depending on the circumstances.

“…but it looked good on paper…” Definitely a lesson on the importance of understanding how implementation details can pull the finished project away from the original design.

The problem with these lessons is that their impact is often felt long after the pivotal event. Feature creep? It always looks like a good idea when nothing costs anything (i.e. it’s just another line on the drawing or another bullet point in the spec). However, when release is delayed due to integration issues that result from the extra bullet point, the fingers point to implementation, testing, etc. everywhere but back to that moment in the conference room in which the bullet point was added–further masking its effect.

Agile methodologies

Since this project, I’ve learned a lot more about projects and project management. Looking back on this, now, gives me the perspective to appreciate how Agile methodologies do a lot to shorten the distance between events of each of the effects listed above and their effects.

Maybe that’s the lesson to take away from the reflection?

What I learned by building a project from scratch – Part 2

v1.0 of my camera self-timer

This post picks up where What I learned by building a project from scratch – Part 1 left off. In the last post, I had designed and tested my device and I was preparing to build a working prototype.

It looked good on paper

Yeah. I didn’t design it to look like this, but that’s what you learn by actually building something. The original design, for example, had put that big, ugly, black thing on the inside. The big, ugly, black thing is the beeper to indicate that it’s about to take a picture.

The inner workings
The inner workings

You can’t really see it from these photos, but I had reserved space for it on the inside. Well, not for the one in the photo, but for the smaller one I originally spec’d in the design. The bad news for my prototype, however, was that I could not get the part I spec’d. So I learned my next lesson:

You can have it now or you can have it good

Two of the three legs in the project management triangle: Fast, Good, Cheap; pick any two. I picked Fast and Cheap.

I had to decide, did I want it finished soon or looking good. Clearly, I picked the former.

All put together, it worked (quite well, actually), but it’s looks left something to be desired.

If I had it to do over again… I’d probably make the same decision. The goal of this prototype was to test the functionality. I could iterate and find a part that fits (or find more suppliers so as to not end up in the same bind on the next iteration), but I didn’t want to delay field-testing–something for which looks were secondary.

Clearly, if I had different goals for the prototype, I might have made a different decision. For example, if the goal was to impress others and raise funding, I would have approached the appearance of the project differently–learning yet another lesson…

Keep your goals clear and in front of you

That says it all.

Finally

inside2
The inner workings from the other side

The device worked quite well and I even used it for what it was designed a few times. While that’s an accomplishment in and of itself, the feature of the design that I didn’t (and couldn’t) appreciate until many years later was its durability–the durability of both the design and the implementation, in fact.

I recently found this prototype in a box hidden in the deep recesses of my garage (where things typically go to disappear). I opened it up and it looked like it did when I built it. The relay (shown in the photo above the battery) needed to have its return spring reattached, but other than that, once I added a battery, it worked just like it used to.

Unfortunately, it lasted decades longer than the camera for which it was designed. Nevertheless, the lessons I learned by building it are timeless.

What I learned by building a project from scratch – Part 1

v1.0 of my camera self-timer

It might not look impressive, but this device represents a considerable learning experience for me–an experience that I hope I’m able to pass on to my future students. The only problem, which I hope to rectify after the fact, is that I didn’t recognize the lessons I learned at the time and so I was condemned to relearn the several times later.

The project

It started off simple enough. I wanted to build a timer that would wait 10 seconds and then take a picture.  After thinking about the application, it occurred to me that the first picture might not come out well, so I added the ability to select how many photos it would take after waiting the first 10 seconds. Time to complete this step: about an hour.

Before I had even started, I was already learning a valuable, albeit at the time unrecognized, lesson.

Lesson 1 – Feature creep

Was the ability to take multiple pictures after waiting really needed? (Probably not.)

Was the cost of this change factored in the decision? (No, because I could do anything, cost was no object.)

The prototype

So with my [already revised] specification in hand, I set off to build a prototype. Being a hardware project meant collecting the necessary integrated circuits and other components and wiring them together on a breadboard. After designing the circuitry and ironing out the logic and state diagrams, committing all that to the breadboard was straightforward. With care and incremental testing, the design came together rather quickly. Time to complete this step: About a day–and I was about to learn my next lesson…

Lesson 2 – The prototype is not the product

It was very easy to get ahead of myself at this point. I had a working prototype. My design was validated. I was heading for home plate.

Not so fast. I was really just heading for first base. I was nowhere near having something I could put in my camera bag, let alone let anyone else use.

The real prototype

But wait! Didn’t I just finish the prototype? Nope. That was just the breadboard–more of a working demo.

Bummer.

The real prototype had to look like something I could actually use. In this step, I had to package it into something that not only functioned, but it had to function in the real world. I needed to give it the physical design some attention.

While it would be some time before I actually studied user-centered design, looking back, I had the right idea. I knew the audience (me) very well and I knew the application, so I laid out the user interface and set to make it happen. I was about to learn my next lesson…

Lesson 3 – A working demo is not a prototype

My breadboard project was really just a working demo. The prototype (as in a working example of the product in, more-or-less, product form) was another level of complexity.